Activity Scheduler

Start-Up Guide
This guide will show you a step-by-step process to create School-only events such as practice schedules, meetings, etc.
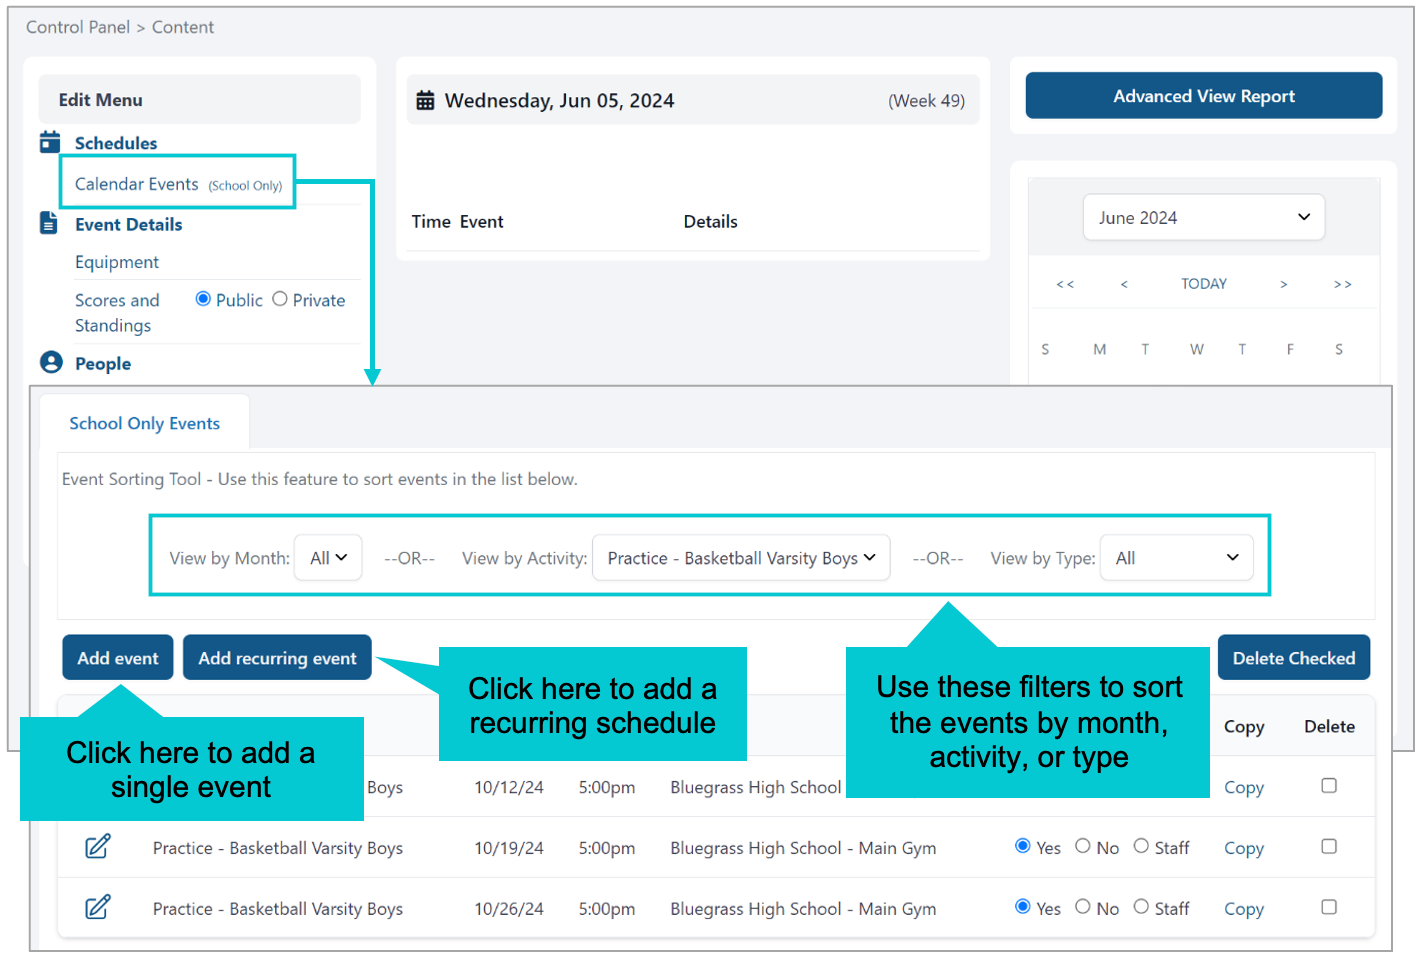
To get started, log in as a Coach to your school’s web Activity Scheduler and go to the Calendar Events (School Only):

Adding a Single Event
When clicking the Add event button, you will be redirected to this page:

1. Select the activity type from the dropdown list.
2. Choose the activity name.
3. Enter the date and time.
4. Select the event location.
5. Add the information such as Set-Up and Tear-down times, approximate number of attendees, and set-up notes for the Custodians/Maintenance Staff.
6. You can add comments for the public and include media links such as tickets URL and live video/audio URL.

7. Select a Contact person for this event.
8. Check the box to keep track of any changes made to this event.
9. Click Save & Exit to finish or click Save & add another event to continue adding more dates.
Note: The Administrators must ensure that Coaches have their assigned Activities added from the administrative side to show all the Activities in the dropdown list.
After clicking the Save & Exit button, it redirects to the Notifications page:

The event will now show on the School Only Events list including its set-up and tear-down times.

Adding a Recurring Schedule
The process of creating a recurring schedule is almost the same as the one used to create one-time events.
To get started, click the Add recurring event button and the system will take you to this page:

1. Select the activity type from the dropdown list.
2. Choose the activity name.
3. Enter the event’s time.
4. Select their location. You can select different locations for various dates.
Continue adding the event details:
2. Choose the activity name.
3. Enter the event’s time.
4. Select their location. You can select different locations for various dates.
Continue adding the event details:

5. Add the information such as Set-Up and Tear-down times, approximate number of attendees, and set-up notes for the Custodians/Maintenance Staff.
6. Choose the dates from the calendar and click the Add button to include in the queue. Proceed to the next calendar page to add more future dates.
7. All selected dates will show on the Events list box. To remove a date from here, click on it and click the Remove button.
8. Click here if you want the system to display the notifications page and notify the recipients.
9. Click Save & exit to complete the process.
The event will now show on the School Only Events list displaying the first date of the recurring schedule:

 Back
Back
|

.jpg)